Setting Up Uptime Kuma on PikaPods
This guide walks you through the essentials of using Uptime Kuma on PikaPods, from pod configuration and account creation to monitoring setup and leveraging status pages, all with the open-source tool Uptime Kuma, designed for seamless website performance tracking.
Watch the video tutorial for a visual demonstration.
Getting Started
Before we start, make sure you’re logged into PikaPods. Not a member yet? Signing up is easy, plus you’ll get $5 in free credit to kick off your pod journey. Ready to set up? Sign in or sign up here.
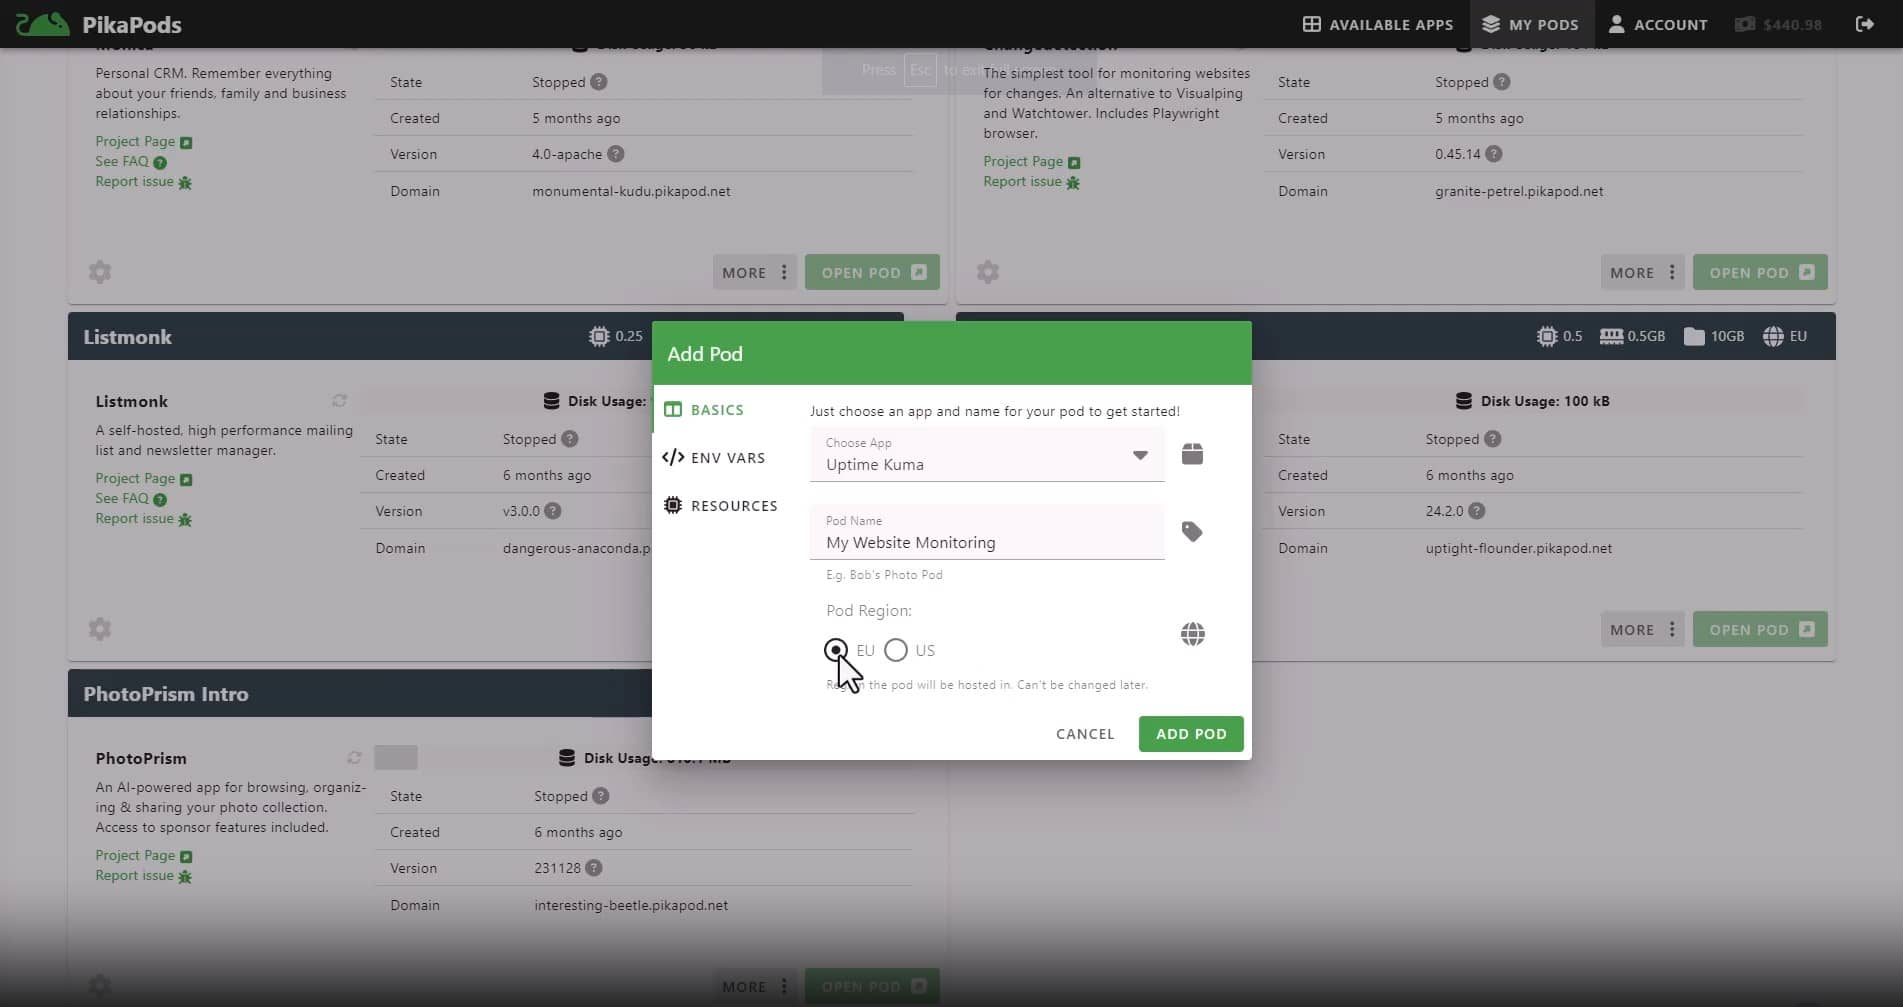
Set up Pod
- Choose Uptime Kuma as your Pod.
- Name your Pod (e.g., “my website monitoring”).
- Select a region for hosting (EU or US).
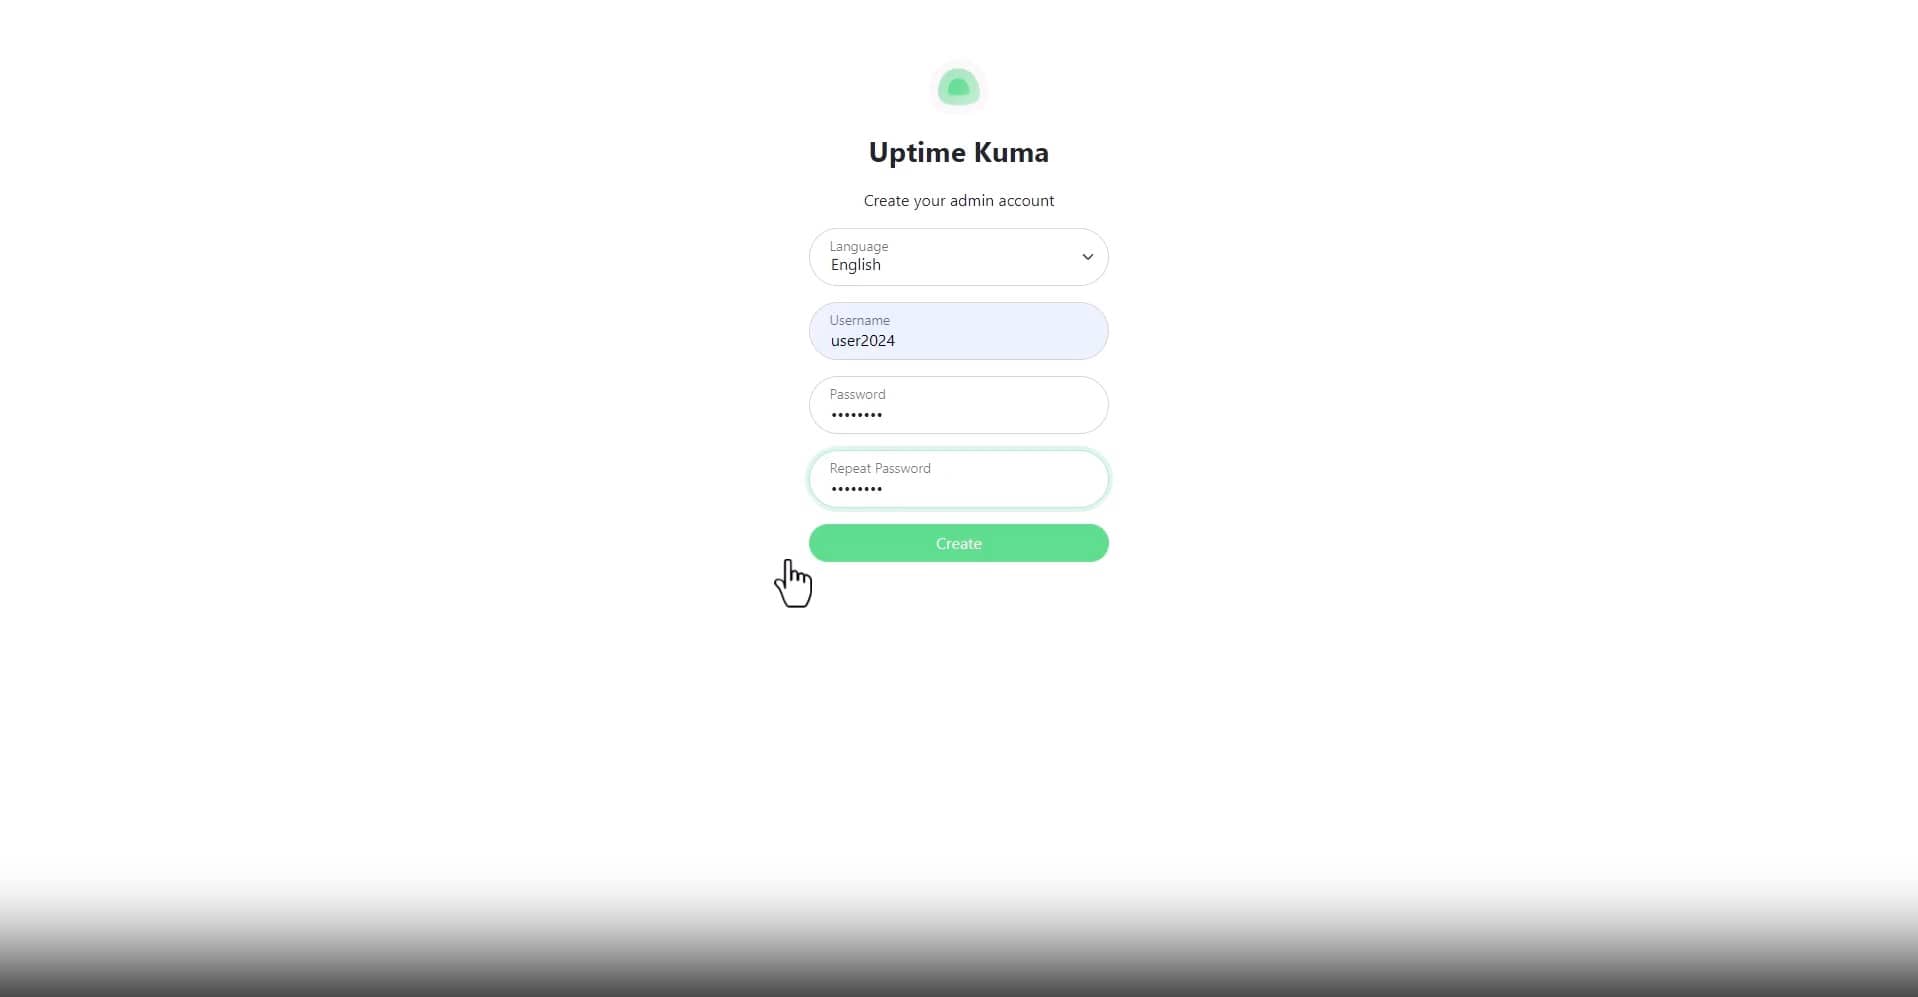
Set Up Uptime Kuma
- Open your Pod to access Uptime Kuma.
- Add a new account with a username and password to reach the dashboard.
Add Your First Monitor
- Click Add New Monitor.
- Select Monitor Type: Ping and Keyword are the most common options.
- Ping: Use this to simply verify if your website is accessible. Enter the website’s hostname or IP address.
- Keyword: This checks for specific words in your website’s content to confirm it’s displaying correctly.
- Name Your Monitor (e.g., “PikaPods Documentation”).
- Add URL: Enter the URL or hostname you wish to keep an eye on. For keyword monitoring, typically, you’d input a website link, such as “https://docs.pikapods.com”.
- Confirm and save the settings for your new monitor.

Configuring Notifications
There are many different notification services to choose from, including email and SMS. To add a new notification channel:
- Select Setup Notifications when editing your monitor or head to Settings > Notifications.
- Select Notification Type.
- Every notification channel will have different options. Enter each of them and then Test to see if they are working.
- Save the new notification channel.

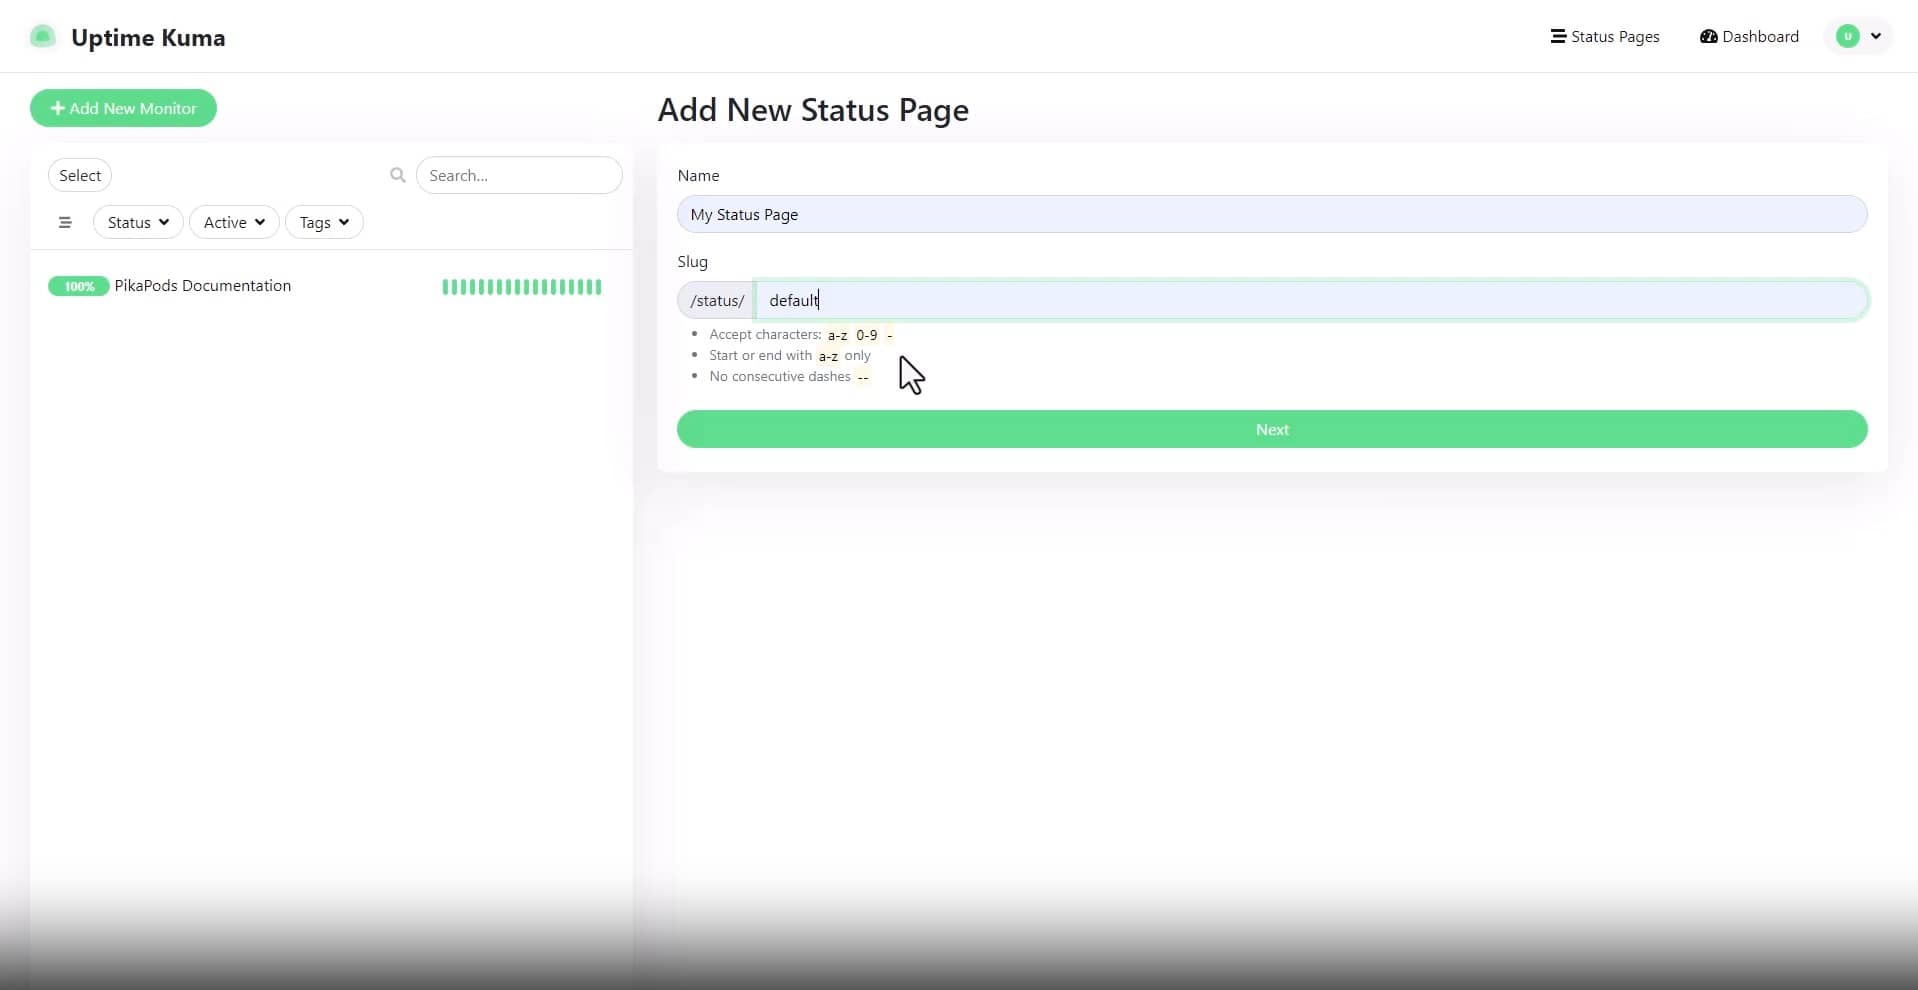
Add New Status Page
- Access the Status Pages feature in the upper right corner of the interface.
- Click on Add New Status Page to start the setup process.
- Define the name of your status page according to your preferences.
- Assign a slug for easy reference, usually utilizing the commonly used ‘default’.
- Select the Monitor you wish to embed. You can also add sections or a description on top.
Now you can share the public URL of the status page and users without an account will be able to view it. You can also post updates on the status page using the Create Incident button when editing the status page.